the diy tutorial
January 27, 2024
alright babes! by request, and for the purpose of ease ( as almost 100% of the time, the personal doing the diy rental, isn’t the person actually manning the camera ) I’ve decided to put together this tutorial post on how to use the diy so you can easily share with whoever is going to be in charge day of!
a little background! what the heck is the diy? during rona, I started offering the diy video rental option. if choosing the base package, you get the camera rental for four days ( a dji osmo pocket ) with two sd cards, a wall charger, and cute little travel bag for it all. you and your friends can capture as much as you want on video, and on the fourth day when you drop the rental back off, I’ll go through the footage and either compile it into a raw reel of all the footage, or you’d get the raw reel along with an edited highlight film, again, depending on the package you choose!
if you’ve gotten to this page and aren’t already doing the diy, more info can be found on the investment tab of my website, linked here.
now! let’s get into it. whether you’re someone who learns from watching or reading, I’ve got ya covered. im going to link both a video, that goes over everything. and then will also include a photo of the camera, with instructions on what buttons do what.
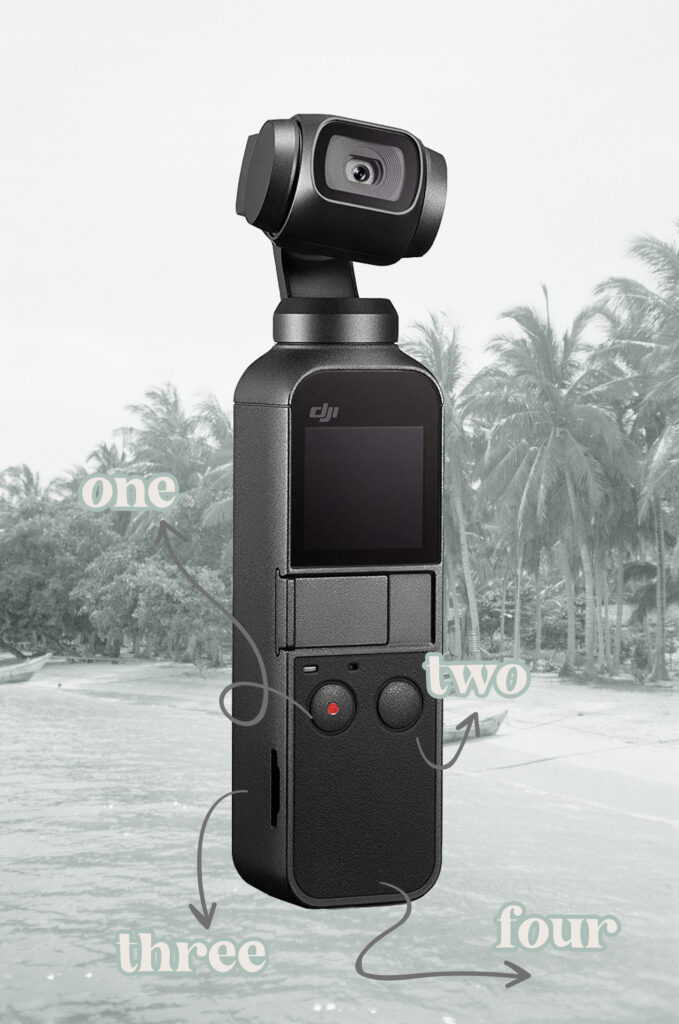
alright, as you can see, the camera is going to be super easy to use! it literally only has four buttons!
button two : the on off button. once you take the camera out of its protective case, hold it upright so it can stabilize itself and press this button to turn it on ( camera can figure out what’s straight) and you’re ready to rock. once you’re ready to turn the camera off, you just hit this button again and the camera will refocus itself so it can fit back into the case ( with the lens facing the back of the case to protect it from getting scratched ).
button one : the record button! I’ll have the camera set up in the video mode for you, so once you hit that red button, you’ll see the flashing red light indicating you’re recording! you’ll also see the timer start so you can see how long your clip is. if neither of those functions occurred when you hit record, you probably switched out of video mode. the screen is a touch screen, so just swipe towards the left and change back to video. there’s a few fun modes on there, but reminder ( unless you did a custom package ), im only going to be editing video for you. if photos are accidentally taken, they will be included in your raw uncut film of all of your footage.
slot three : the sd card slot! I will already have an sd card in the camera, ready to go. I’ve never had anyone totally fill it up with footage, so you should be good! but! in case you do fill it up, there will be an extra in the bag. its going to be a micro sd card inside of a bigger one, in a plastic container. to remove the one in the camera, just slightly push into it with your nail and it will pop up. pull the mini sd card out of the big one that was in the bag and swap them! put the one you just used into the big sd card, and the empty one into the camera. be sure to store it back in the plastic container to keep it safe.
four : the charging port. in the bag will be a wall charger. the camera runs for about three hours continuously, thought the camera won’t ever likely be actually on for three hours in a row. but if you notice the battery starting to drain ( there will be a battery life counter on the top corner of the screen ) just plug it into the wall to get extra charge during slow times.
if you’re more of a visual learner, heres the video tutorial!

Add a comment
0 Comments